Thursday, February 09, 2012

Cranberry Muffins

I posted on Facebook a while ago about making cranberry muffins.  I got requests for the recipe and fully intended to post it before Christmas (because cranberries are kind of Christmas-y), but then Hallie Lou made her appearance and I... kind of fell off the blogosphere.

SO... I decided to share them again for Valentine's Day, since they're, you know... red and all. ;) I even baked them in heart-shaped muffin tins.  How cute and Valentine-y!


You can use fresh or frozen cranberries but, since fresh ones aren't in season, I'd recommend the frozen ones.  I found my frozen berries at Central Market; my local grocery didn't have them.  Seriously couldn't tell the difference!

(Actually, the recipe calls for partridgeberries [lingonberries], so if you're lucky and live in Canada, you should definitely use them rather than cranberries if you can find them!)


Start by creaming the butter and sugar.  This is my favorite part of baking. I always like to sample... yum!


Add egg, vanilla, milk, baking powder, and salt to your buttery-sugary blend.

With flour mixed in.
Then, mix in the flour.  My mom always did two parts white flour and one part whole wheat, but you can use all white (or all wheat) if you like.


Pour in the berries and fold until incorporated.


Mmm!


And the finished product.  Look how cute they are!  And yummy, too.  I am not ashamed to say that I could eat a whole batch of these babies in a few days.

Hey, cranberries are healthy... and they're made with a little wheat flour, right? ;)


Cranberry Muffins Recipe

1/3 cup butter
1 cup sugar
1 egg
1 teaspoon vanilla
3/4 cup milk
2 teaspoons baking powder
1/4 teaspoon salt
1 1/2 cups white flour
3/4 cup wheat flour

1.  Preheat oven to 350. Cream butter and sugar.

2. Mix in egg vanilla, milk, baking powder, and salt.

3. Stir in flour until blended.

4. Fold in berries until incorporated.

5. Fill muffin tins 2/3 of the way.  Bake for 20 minutes.

Tip:  reserve some berries to add in once you start getting to the bottom of the bowl.  If you don't, you might end up with some berry-less muffins!

Saturday, February 04, 2012

Ruffle Butt Onesies!

So I'm FINALLY getting around to revealing the project I've been working on.  Three cheers for me!

I made these absolutely adorable personalized onesies!


Side note:  my autocorrect keeps wanting to change "onesies" to "onuses." What the heck are onuses?  Do I even want to know??

Anyway...

I was a hostess for my sister-in-law's baby shower this past weekend.  One of my favorite items from my son's baby shower was a set of personalized onesies, so I decided to make some for my little niece, Faith.  (Ahh!  I can't believe I'm going to be an auntie!)

I had planned everything out how I wanted them to look, following this Silhouette/appliqué tutorial from Jen @ My Own Road.

And then, I came across the ruffle butt onesies on Pinterest.

Can we say "OH. MY. GOODNESS"?

Immediately, I was obsessed!

I had planned on doing four, but they took me a lot longer to finish than I'd originally anticipated.  So I just did three.  I don't think they could have turned out better!

Apologies for the weird angled pics.  I forgot to snap
pictures of them until they were already hanging up.

I used my Silhouette to cut out the appliqués from fabric, which already had fusible interfacing ironed on. Then I ironed the cutouts to the onesies.

After I had them on, I applied some fray check, just to cut down on the fraying and then I straight-stitched them on.  I wanted them to fray a little (my sister-in-law likes the shabby-chic stuff), but I didn't want too much!

Note to self (and anyone else who cares):
Gingham frays like nobody's business!
I cut out my ruffles with pinking shears and applied fray check to the edges.  Then I followed the tutorial for sewing them on.

After washing the onesies, two of the ruffles started coming off.  GASP.  I guess my backstitching wasn't holding too well, even though I used a very gentle cycle!  SO... I re-sewed them and then went off to Walmart to get some liquid stitch, which was applied to the undersides of the ruffles for added support.

I also added a bit of the liquid stitch to the undersides of the appliqués for the same reason (and I used it to put the button on the last one... the needle wouldn't go through all the layers of ribbon). 

Yes, I know the ruffles are in the wrong order on this one.
It was the last one and I was sewing around midnight. :|
Anyway!  I just love how they turned out!  Apparently everyone else did, too, because I was asked numerous times if I had an Etsy shop or if I would take orders.  Ha!

First things first:  I need to make some for Hallie! :)

Thursday, January 26, 2012

Sneaky Peeky

I've been a busy mama working on my first Silhouette/sewing machine project.

I think I'm obsessed. ;)

The project isn't finished yet.  I've had to figure out my machines as I go... which has been fun, but time consuming.

Additionally, I keep forgetting to get things.  Like pinking shears.  I thought to myself, "I don't need those for this project; I'll get them later."  You know, to avoid spending a bunch of money right off the bat.

Well, as it turns out, I do need them. :|

So, I'll be going out tomorrow to get them and hopefully finishing my project over the weekend.

I'm so excited to share it with you guys... but for now, I'll leave you with this sneak peek!

Enjoy!

Tuesday, January 17, 2012

Shampoo Free

I have to say that I am intrigued by the idea of not using shampoo.

Enough so to want to try it.

I came across this idea while browsing Pinterest one day.  Actually, I found a link to natural face cleansing, which I've started (and LOVE).  Linked from that post was the one about going off shampoo.

The idea is that shampoo gets rid of the oil that your scalp makes.  And now you're thinking, "Well, duh!"  BUT... that oil is good for you.  It protects your skin and keeps it from drying out.

It's like a never-ending cycle:  you wash your hair to get rid of the oil, but your scalp responds by creating more oil.  The more you wash, the more oil is produced.  I'm simplifying it a lot, but if you're interested in more information, read Tsh's original blog about it here.

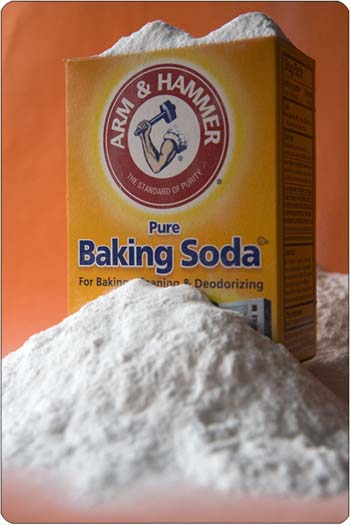
With this natural shampoo-free method, you use baking soda and water to cleanse your scalp.

Baking soda!

Instead of stripping your scalp of the oil it works so hard to create, baking soda only removes the dirt and sweat.  It takes a few weeks, but gradually your scalp will get used to not having to produce as much oil and it'll only make what is needed.

Tsh actually has some other great suggestions for all natural beauty products.  Like using lanolin as lip balm?  Who knew??  And coconut oil as lotion or moisturizer?  I'm in awe.

I'm all about all-natural stuff.  Ask anyone!  And when you can do all natural and save money?!  Count me in!!

Anyway.  I'm way excited about trying out this new method of hair care.  I would have already switched over, but for the fact that I had just bought a new bottle of shampoo before I found the idea. :| Lame, right?  And when you consider that I only wash my hair 2-ish times a week, this stuff is lasting for.ev.er!

I'm contemplating giving my shampoo to Drew when he runs out so that I can switch.  Then when we're completely out of shampoo, I'm going to see if he'll switch with me.

We'll see. ;)

I'll keep y'all updated as the year progresses!


Friday, January 13, 2012

Goals for the New Year

So my post is two weeks late.  I was out of town for Christmas/New Year's and am just now getting back into the swing of life at home.  Don't judge. ;)

Last year, my only resolution was a reading list.  I read most of the books on it, so I'm quite proud of myself.  I think the only one I haven't finished is Jane Eyre... mostly because we moved when I was half-way through and I just kept forgetting to pick it back up. :/ It will get finished eventually...

But Drew and I made a couples' resolution apart from any personal resolution that we might make on our own.  Stop arguing.  And I like to think we did a pretty good job with it.

We still have fights and, yes, even the occasional argument.  However, I like to think we've banished the argumentative spirit from our home.  It's been a process that hasn't been perfected yet, but we're still working on it.

We still disagree.  A lot.  But we have learned that there are better, more productive ways of resolving our conflicts.  We talk.  We try not to get upset or angry when we do.

I won't lie.  It's still hard.  We are argumentative people.  I know that I still get in moods where I disagree with everything that Drew says.  (Drew calls them "contrary moods.")  But we are working, striving.

And we are succeeding, slowly but surely. :)

This year, I've decided to set some goals for myself.  Not resolutions, mind you.  Goals. The difference?  Resolutions are vague and usually too lofty to achieve.  Goals... well, they're:


SO.  Here are a few of my 2012 Goals:
- Go 'poo free... for so many reasons.
- Read a daily devotional book for moms.
- Fully decorate my house.
- Blog more, starting with once a week!- Craft (with my new sewing machine and Silhouette Cameo)!  This is broken down into more specific goals in my head... like make clothes for my kids, make gifts for my family, make custom decor for my house, et cetera.

I probably have more, but I'm running out of time.  There is lunch to be made for my hungry boy!  More details on these goals and more to follow soon! :)

LinkWithin

Related Posts Plugin for WordPress, Blogger...